Choosing the Right Materials
To begin your pillow-making journey, it’s vital to select the right materials. Your choices in fabric and stuffing will influence both the appearance and comfort of your final product.
Selecting the Best Fabric for Your Pillow
Choosing the right fabric is key to how to sew a pillow that suits your home and style. Here are some tips:
- Consider the use: Will the pillow be decorative or functional? Choose accordingly.
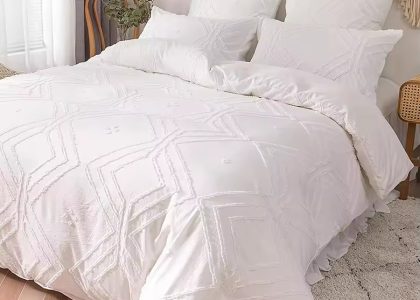
- Texture matters: Soft fabrics like chenille or velvet add a cozy feel; cotton is great for everyday use.
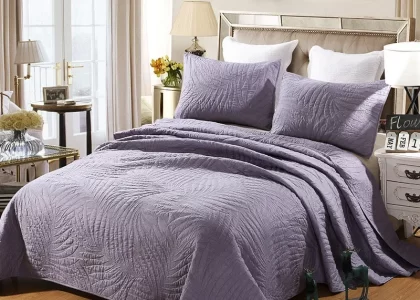
- Durability is important: Heavier fabrics like brocade last longer, especially for pillows that get a lot of use.
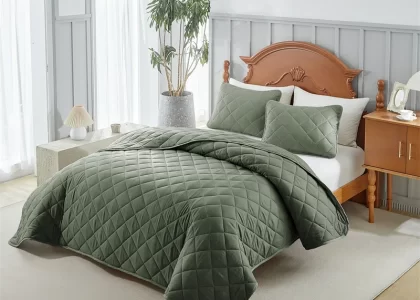
- Go for style: Pick colors and patterns that match your room or express your personality.
- Think about care: If you want a low-maintenance pillow, choose fabrics that are easy to clean.
Understanding the Different Types of Stuffing
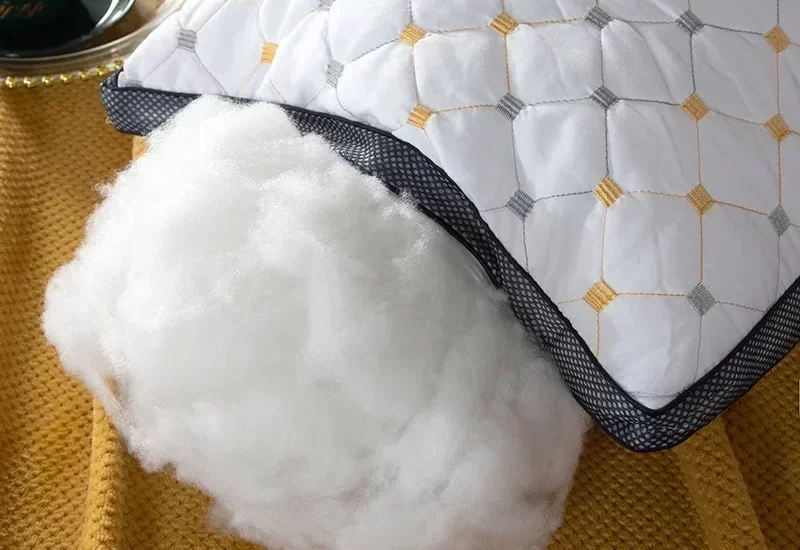
Stuffing not only determines the comfort of your pillow but also its form:
- Polyfil: This is a popular, affordable choice that’s easy to find and use.
- Foam or batting: These can give your pillow more structure and are great for seat cushions.
- Down: For a luxurious, soft feel, down is an excellent, though pricier, option.
Remember to pick stuffing based on how firm or soft you want your pillow, and consider any possible allergies to certain materials. Whichever you choose, make sure it complements your fabric choice to create a comfortable, attractive pillow.
Preparing the Pillow Design
How to sew a pillow? Creating the perfect pillow begins with thoughtful preparation of its design.

Deciding on the Pillow Size and Shape
When learning how to sew a pillow, deciding its size and shape is your first step. Think about the room where you’ll place the pillow and the purpose it will serve. Smaller, decorative pillows can add a pop of color, while larger ones offer more support and comfort. Common pillow sizes include 16×16, 18×18, and 24×24 inches. Don’t shy away from unconventional shapes; embrace creativity with round, heart, or even animal-shaped pillows.
Adding Seam Allowances for Your Pillow
Once you decide on the pillow size, calculate the seam allowance. Add at least 1/2 inch on each side of your fabric measurement to ensure the finished pillow doesn’t end up too small. This space is crucial for sewing seams without losing pillow size. For an 18×18 inch pillow, cut the fabric to 19×19 inches to include seam allowances. Proper allowance makes assembling and stuffing your pillow easier, resulting in a neat, professional look.
Cutting and Pinning the Fabric
After you’ve selected your fabric and stuffing, it’s time to start the physical creation of your pillow. The process begins with cutting and preparing your fabric, a fundamental step in learning how to sew a pillow.
Measuring and Cutting Your Fabric Squares
Begin by measuring your fabric. For an 18×18 inch pillow, you’ll need two fabric squares each measuring 19×19 inches to account for seam allowances. Measure carefully, and mark your fabric with tailor’s chalk or a fabric pen.
- Place your fabric on a flat surface.
- Use a ruler to measure and draw your cutting lines.
- Double-check your measurements for accuracy.
- Cut along the lines with fabric scissors or a rotary cutter.
Ensure each square is even so your pillow won’t come out lopsided.
Pinning Fabric Pieces Right Sides Together
Once your squares are cut, pin them together. This holds them in place and makes sewing easier.
- Take the two squares and lay them with the right sides facing each other.
- Pin around the edges, leaving pins out where you plan to leave a gap for stuffing.
- Ensure the pins are placed so they won’t get in the way while sewing.
- Check that the fabric is smooth and free from wrinkles before pinning.
This preparation paves the way for the next step: sewing the pillow together. By carefully following these instructions, you’ll set yourself up for a successful sewing experience.
Sewing the Pillow Together
Embarking on the sewing journey, you’ve now reached the exciting part: stitching your pillow together. This stage is where the magic happens, turning flat fabric into a three-dimensional, functional piece of home decor.
Stitching Around the Edges with a Seam Allowance
It’s time to start sewing! Before diving in, ensure you have the right size needle and thread color that matches your fabric. Here’s how you’ll stitch:
- Begin at the gap’s one end. Remember, this is where you’ll later turn the fabric right-side-out.
- Keep your needle 1/2 inch from the fabric edge; this is the seam allowance.
- Backstitch a few stitches to secure the starting point.
- Sew straight, pivoting the fabric at corners to maintain the seam allowance.
- When you reach the gap’s other end, backstitch again to reinforce the seam.
This step establishes the pillow’s perimeter and is vital for a durable end product.
Leaving a Gap for Stuffing
What’s unique about sewing a pillow is leaving an opening. This gap is essential for adding the stuffing, which gives life to your creation. Here’s how to execute it effectively:
- Choose a spot on one side to leave a 3 to 4-inch gap.
- Mark the gap zone with different colored pins or a fabric marker to avoid sewing it shut.
- As you stitch around the pillow’s edges, remember to skip over this area.
Once you sew the edges and leave a gap, you’re set up for the next step: turning and stuffing your pillow to perfection.
Turning and Stuffing the Pillow
Once you’ve sewn the edges, it’s time to turn and stuff your pillow. This stage transforms the flat fabric into a cozy, plush object. Focus and attention to detail will ensure your pillow looks and feels just right.
Turning the Pillow Right-Side-Out through the Gap
Creating the final three-dimensional shape starts by turning the pillow right-side-out. Here’s what to do:
- Find the gap you left earlier.
- Reach inside the gap and gently pull the fabric through.
- Turn the fabric until the right sides are facing out.
- Smooth out the edges and prepare for stuffing.
Turning the fabric can be tricky, but patience goes a long way. If corners stick, use a tool like a chopstick to poke them out.
Stuffing the Pillow Evenly and Shaping the Corners
Stuffing your pillow evenly is crucial for a full, comfortable final product. Follow these steps for the best results:
- Use your stuffing to fill the corners first.
- Add stuffing little by little to prevent lumps.
- Push stuffing into each corner with your tool.
- Keep adding until the pillow feels firm yet soft.
As you stuff, periodically check for evenness. Adjust the stuffing by pushing it around inside the pillow. Well-stuffed corners give your pillow a professionally finished appearance. When you’re satisfied with the shape and feel, it’s time to finish your pillow.
Finishing Your Pillow
To complete your pillow, a couple of final touches are needed.
Ironing the Fabric and Preparing the Gap for Closure
After the stuffing process, ironing helps tidy your pillow’s appearance.
- Lay your pillow flat with the gap edges exposed.
- Use an iron to press down the fabric, aiming for a smooth finish.
- Pay extra attention to the gap area; pressed edges make closure easier.
Ironing not only makes your pillow look neater but also aids in the closing process.
Options for Closing the Gap: Hand Stitching vs. Machine Stitching
To finish, you’ll need to close the opening.
- Hand Stitching: For an invisible seam, hand-stitch using techniques like the ladder stitch.
- This method takes more time but results in a cleaner look.
- Machine Stitching: If you plan to use a pillowcase, machine stitching is quicker.
- The seam will show, but it’s fine when hidden by a case.
Whichever method you choose, ensure the stuffing is pushed away from the gap for easy sewing. Match up the fabric edges and secure your stitches at both ends.
Closing the gap neatly is key to a beautiful and durable pillow.
Customization Tips for Your Pillow
After mastering the basics of how to sew a pillow, you can get creative. Customizing your pillow can complement your decor and showcase your personality.
Exploring Decorative Options for Personalization
Personalization turns a simple pillow into a unique piece. Consider these ideas:
- Embroidery: Add elegant designs or initials.
- Patches: Sew on patches for a quirky touch.
- Fabric paint: Create patterns or write quotes.
- Buttons and beads: Embellish with sparkle for texture.
- Ribbons and lace: For a vintage feel, add delicate trims.
Your imagination is your limit. Pick designs that reflect your taste.
Ideas for Utilizing Removable Pillow Cases
Removable cases extend your pillow’s life and vary your style. They are practical too.
- Seasonal themes: Switch cases for holidays or seasons.
- Easy cleaning: Wash without the entire pillow.
- Color change: Update your room’s look quickly.
- Protection: Keep the stuffing safe and clean.
- Gifting: Personalized cases make thoughtful gifts.
The second tutorial mentioned in the reference blog will guide you on making a zippered case. Zippered or envelope-style cases are both popular choices.
With these ideas, you’re ready to add personality and versatility to your homemade pillows.